# Configure Email Campaign

### Create Email <a href="#create-email" id="create-email"></a>

Go to **Marketing** and click on **Email**

<figure><img src="/files/T6wcd48NuF0GzIJugCw5" alt=""><figcaption></figcaption></figure>

Click on **+ New Email** Button

<figure><img src="/files/PDMEEZHoDtYBdiGV1WGx" alt=""><figcaption></figcaption></figure>

User can configure two types of email i. e. **Instant** and **scheduled**

To **Instant** type of email

Click on type dropdown and select **Instant** type

<figure><img src="/files/lvxM7R6GbxYzdgickEQE" alt=""><figcaption></figcaption></figure>

For **schedule** email: You need to add schedule date and time

<figure><img src="/files/v2AqfT0hCRQUS1gfph75" alt=""><figcaption></figcaption></figure>

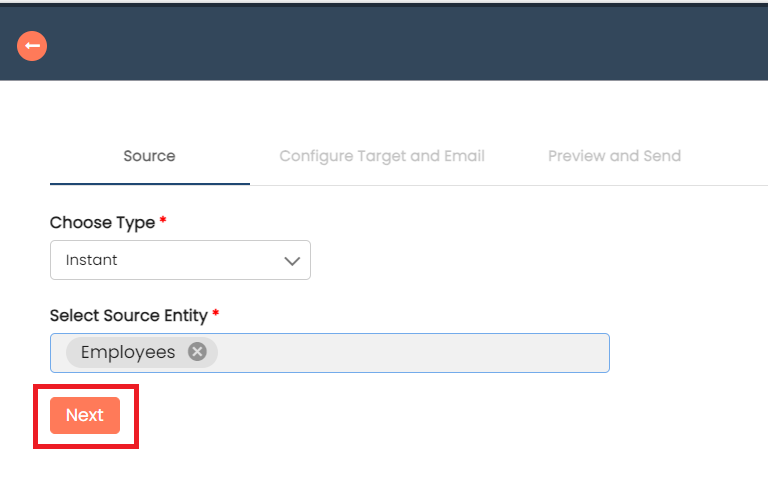
Click on **source entity** field and select the source entity, those who you want to send the email

<figure><img src="/files/JPPslg8G4NWhz1LTTKrk" alt=""><figcaption></figcaption></figure>

Click on **next** button then jump to next tab i.e. Configure target and email

<figure><img src="/files/eYGjKN1XBkuDX7Keqcdm" alt=""><figcaption></figcaption></figure>

### Configure target and email <a href="#configure-target-and-email" id="configure-target-and-email"></a>

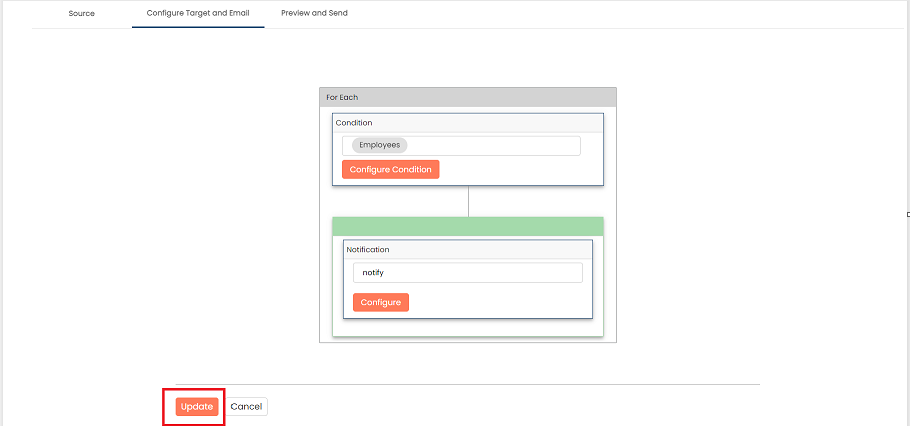
Click on **Configure Condition**

<figure><img src="/files/tWHct119UMCPvWU1UWQw" alt=""><figcaption></figcaption></figure>

Select email of employee whose you want to send email

<figure><img src="/files/kgQflCF14ZebnBvajyCf" alt=""><figcaption></figcaption></figure>

Click on **Ok** button

<figure><img src="/files/f2egG8nsO9Kxr5AvoxUp" alt=""><figcaption></figcaption></figure>

Click on configure button

<figure><img src="/files/31SZRWXojfQbm2zkLTUT" alt=""><figcaption></figcaption></figure>

Enter the all details You want to send and click on **OK** button

<figure><img src="/files/89W0a8u874oA6OH8eFKz" alt=""><figcaption></figcaption></figure>

Click on **Update** button

<figure><img src="/files/GhNuYgp4ADueXCVjlt6F" alt=""><figcaption></figcaption></figure>

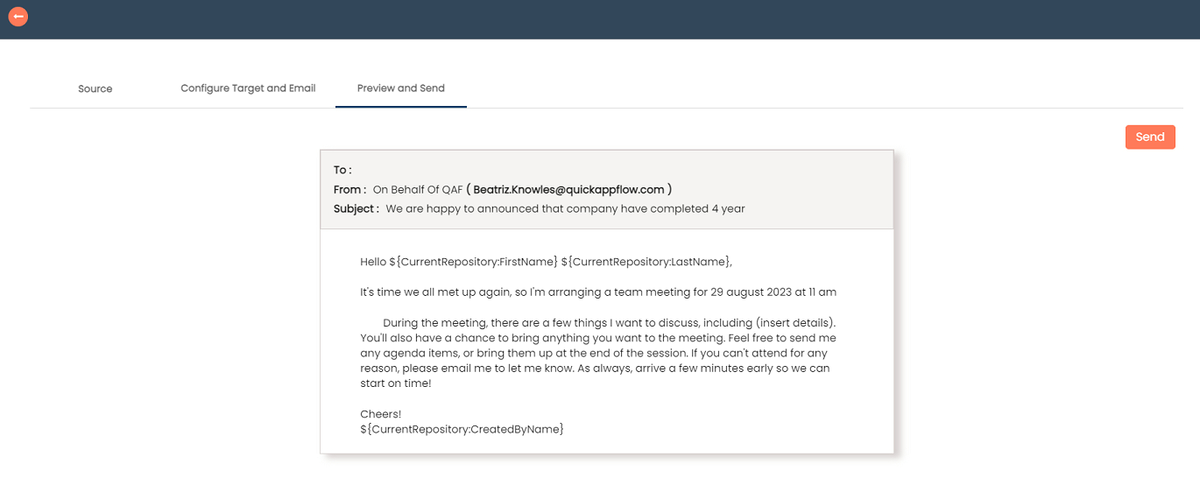
You can view email preview in **Preview and Send** tab

<figure><img src="/files/nvIXzHpmOYTjjnBbizm0" alt=""><figcaption></figcaption></figure>

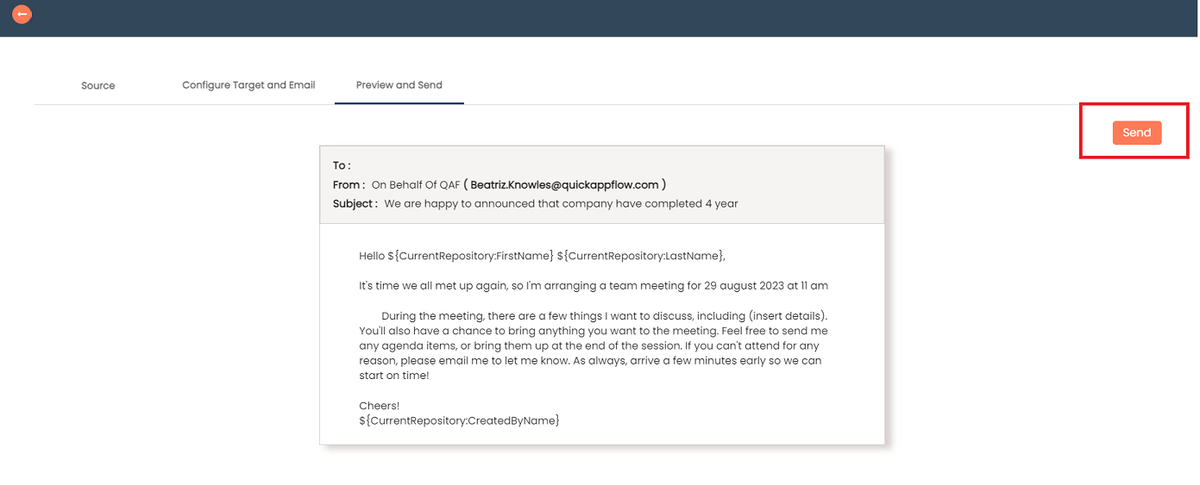
When click on send button Email will be **Sent**

<figure><img src="/files/rWTcgLxufraWuMa56w5j" alt=""><figcaption></figcaption></figure>

Before sending a mail, the mail is on a draft mode, You can see when select **Draft** option

<figure><img src="/files/nS5jEDjpupyAyT8IJCFj" alt=""><figcaption></figcaption></figure>

After sending **Instant** mail, The mail is on executed mode, You can see when select **Executed** option

<figure><img src="/files/VJ0viFAc1tEoFCz2Tkan" alt=""><figcaption></figcaption></figure>

If you want to **archive** email then click on the Action (3 vertical dots) ![](https://help.quickappflow.com/~gitbook/image?url=https%3A%2F%2F531923687-files.gitbook.io%2F%7E%2Ffiles%2Fv0%2Fb%2Fgitbook-x-prod.appspot.com%2Fo%2Fspaces%252FnhvnNmu6p9CSODwQTjgf%252Fuploads%252FueZgwzF61l1SxSeEGpwT%252F16.png%3Falt%3Dmedia\&width=300\&dpr=4\&quality=100\&sign=96c24313\&sv=2) and select archive option

<figure><img src="/files/II2OorxtqH9xugNkJb6L" alt=""><figcaption></figcaption></figure>

After archived a mail, You can see when select **Archived** option

<figure><img src="/files/dE45Z5kV12bT8vYl7jhG" alt=""><figcaption></figcaption></figure>

After sending **scheduled** mail, The mail is on scheduled mode, you can see when select **Scheduled** option

<figure><img src="/files/L4LR0FG5ekXgFzgceFPg" alt=""><figcaption></figcaption></figure>

Click on the Action (3 vertical dots) ![](https://help.quickappflow.com/~gitbook/image?url=https%3A%2F%2F531923687-files.gitbook.io%2F%7E%2Ffiles%2Fv0%2Fb%2Fgitbook-x-prod.appspot.com%2Fo%2Fspaces%252FnhvnNmu6p9CSODwQTjgf%252Fuploads%252FQ1z6nJxhHtLYq317bjFB%252F20.png%3Falt%3Dmedia\&width=300\&dpr=4\&quality=100\&sign=d50e883f\&sv=2) for the email which you would like to delete and click the **Delete** button

<figure><img src="/files/L3pG7tiB7w8zGGGhrhmr" alt=""><figcaption></figcaption></figure>

Last updated 15 December 2025


---

# Agent Instructions: Querying This Documentation

If you need additional information that is not directly available in this page, you can query the documentation dynamically by asking a question.

Perform an HTTP GET request on the current page URL with the `ask` query parameter:

```
GET https://docs.aiflo.app/crm/marketing/configure-email-campaign.md?ask=<question>
```

The question should be specific, self-contained, and written in natural language.
The response will contain a direct answer to the question and relevant excerpts and sources from the documentation.

Use this mechanism when the answer is not explicitly present in the current page, you need clarification or additional context, or you want to retrieve related documentation sections.